
Tango How-To Guides if you have ever spent an hour writing out a step-by-step process only for your colleague to ask Wait, where do I click again you already understand why Tango exists.
Tango is a browser-based tool that creates polished, screenshot-driven how-to guides automatically as you click through any workflow. No recording software. No manual screenshots. No design skills required.
This guide covers everything: what Tango is, how to use it from scratch, advanced tips your competitors do not tell you, who it works best for, and honest answers to the questions most people have before they commit.
What Is Tango

Tango is a Chrome and Edge browser extension that watches what you do on screen and turns your clicks into a formatted, numbered, screenshot-annotated how-to guide in real time.
Once you finish a workflow, Tango produces a ready-to-share document. You can send it as a link, export it as a PDF, embed it in a knowledge base, or pin it inside the tool where your team actually works.
The core idea is simple: you do the work once, and Tango documents it for you.
What Tango Is Not
Before going further, it helps to know what Tango does not do:
- It is not a video recorder. Guides are screenshot-based, not video.
- It does not capture desktop applications on its free plan. You need Tango Pro or Enterprise for offline/desktop software.
- It is not a full documentation platform. For heavy branching or animated guides, you may need to export and edit further.
Who Should Use Tango
Tango works best for anyone who explains the same thing more than once. That is a wider group than most people expect.
- Team leaders and managers use Tango to document onboarding processes so new hires can self-serve from day one.
- Customer support teams create Tango guides once and share them with customers on repeat, cutting response time significantly.
- Content creators and educators use it to build tutorials for students, blog readers, or online course members, especially for visual learners who need to see exactly where to click.
- Operations, IT, HR, and finance teams use Tango to standardize SOPs, software rollout instructions, and process documentation across departments.
- Freelancers and agencies create client-facing walkthroughs for tools and platforms they set up on someone else’s behalf.
If your job involves showing people how to do something on a computer, Tango is worth your time.
How to Set Up Tango: Step by Step
Step 1: Install the Browser Extension
Go to the Chrome Web Store or the Microsoft Edge Add-ons store and search for “Tango.” Click “Add to Chrome” (or Edge). The extension icon will appear in your browser toolbar.
If the icon does not appear automatically, click the puzzle piece icon at the top right of your browser, find Tango in the list, and pin it.
Step 2: Create a Free Account
Click the Tango icon and sign up with your email or a Google account. Your guides are saved to your Tango dashboard automatically, so you can access, edit, and share them from any browser.
Step 3: Navigate to the Starting Point of Your Process
Before you hit record, open the website or web app you want to document. Tango only captures what happens after you click “Record,” so starting in the right place saves you editing time later.
Step 4: Click “Capture Workflow”
Open the Tango extension and click the “Capture Workflow” button. A small controller will appear at the bottom of your screen. This shows you that Tango is actively recording your clicks.
Step 5: Work Through Your Process Naturally
Click through your workflow at whatever pace you like. There is no countdown and no pressure. Tango captures each click, highlights the element you interacted with, and takes a cropped screenshot automatically.
You can pause the recording at any point using the controller if you need to do something you do not want captured, such as entering a password or navigating away briefly.
Step 6: Click “Complete”
When you have finished the process, click the green “Complete” button in the controller. Tango will automatically open your new guide in the Workflow Editor.
How to Edit and Polish Your Tango Guide
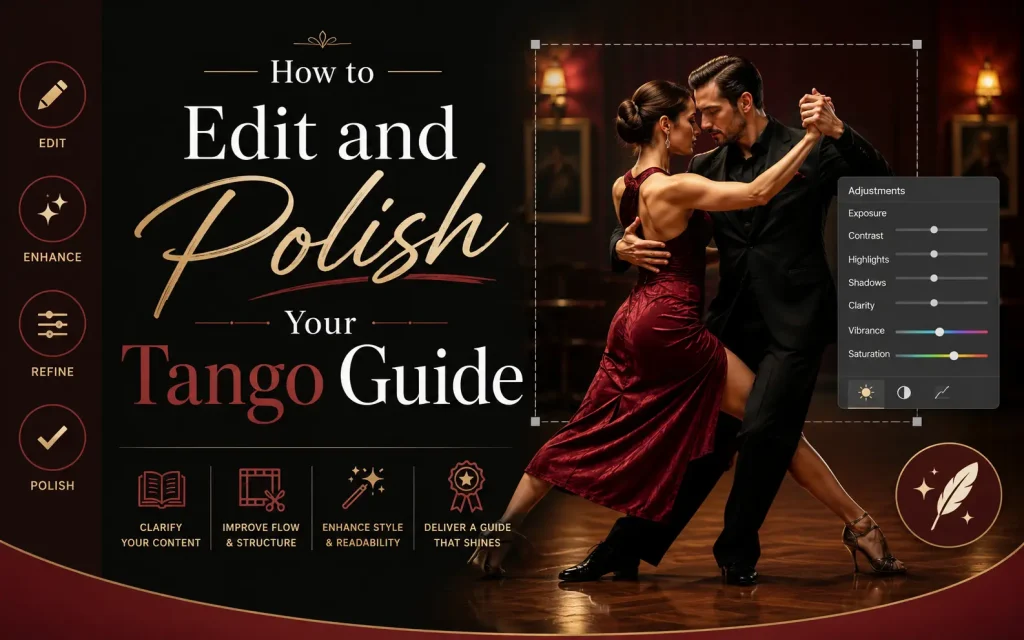
The auto-generated guide is a solid first draft, but a few minutes of editing turns it into something genuinely useful.
Edit Step Titles and Descriptions
Tango auto-generates step descriptions based on your actions. These are usually accurate but can be generic. Rename steps to match your team’s language. For example, “Click element” becomes “Click the blue Save button in the top right corner.”
Adjust Screenshots
Inside the Workflow Editor, you can zoom in on a specific part of a screenshot, drag the crop to focus on the most relevant area, or replace a screenshot entirely if it did not capture correctly.
Reorder or Delete Steps
The left panel shows all your steps as a list. Drag and drop to reorder them or click the bin icon to remove any steps that were captured by mistake.
Add Hyperlinks and Extra Context
You can insert links into any step description. This is useful for pointing readers to related guides, official documentation, or reference materials without cluttering the main instructions.
Use the Blur Tool for Sensitive Information
If a screenshot captured a name, email address, API key, or any private data, use Tango’s built-in blur feature to redact it before sharing. This is one of the most important steps if you are creating guides for external audiences.
How to Share Your Tango Guide
Once your guide is ready, you have several ways to get it in front of the right people.
- Share a direct link. Every Tango guide gets its own URL. You can send this via email, Slack, Teams, or any messaging platform. Recipients do not need a Tango account to view it.
- Embed in a knowledge base. Tango integrates with Notion, Confluence, Guru, and other documentation tools. You can embed a live guide directly in a page so it stays up to date automatically.
- Export to PDF. Download a polished PDF version for printing, attaching to tickets, or archiving. This is useful for regulated industries where documentation needs to be stored offline.
- Export to HTML or Markdown. Developers and technical writers can export guides in these formats for use in code repositories, developer documentation, or custom portals.
- Pin inside a tool. With Tango’s browser extension, you can pin a guide inside the specific web app it relates to. Teammates see the guide right where they need help, without switching tabs or searching a knowledge base.
Tango Guidance Mode: The Feature Most Guides Miss
One of Tango’s most powerful features is almost never covered in competitor reviews: Guidance Mode.
When a teammate opens a guide through the Tango extension, they can activate Guidance Mode. Instead of reading the guide in a separate tab, the instructions appear as an overlay directly on top of the web app they are using.
Each step highlights the exact button or field on screen and shows the instruction right next to it. The user clicks through the actual process, guided step by step, without ever switching windows.
This is the difference between handing someone a printed manual and standing next to them while they do the task. Guidance Mode removes the “but which button is that?” problem entirely.
Tango Analytics: Know Where People Get Stuck
Another feature missing from most how-to guides is Tango’s built-in analytics.
If you are on a paid plan, you can see exactly how many people have viewed your guide, how far they got through each step, and where they dropped off. This tells you which steps need clearer explanations or better screenshots.
For teams using Tango for training, this data is valuable. If 40% of new hires stop reading at Step 6, that step needs to be rewritten. Without analytics, you would never know.
Tango for Different Use Cases
Creating Employee Onboarding Guides
Instead of scheduling repeated onboarding calls, create a Tango guide for every key system your new hire needs to use. Cover login processes, where to find templates, how to submit expenses, and how to request time off. Compile these into a folder and share the folder link on their first day.
The result: new employees can self-serve through their first week without blocking a manager’s calendar.
Creating Customer-Facing Tutorials
If your customers regularly contact support asking the same questions, Tango guides are a scalable solution. Create a guide for each common question, add them to a Help Center page or embed them in automated support emails, and watch ticket volume drop.
Tip: use the blur feature to remove any internal references before sharing externally.
Creating SOPs for Operations Teams
Standard Operating Procedures (SOPs) written in paragraphs are often ignored. A Tango-based SOP shows the process visually, step by step. It is harder to misinterpret and faster to follow than a block of text.
Because Tango guides are easy to update, you can keep SOPs current without rewriting an entire document. Just capture the updated workflow and replace the old guide in your knowledge base.
Creating Software Rollout Documentation
When your company rolls out a new tool, the biggest friction point is training people to use it. Create Tango guides for each core workflow before launch day. Share them ahead of the rollout so teams can prepare. Pin them inside the new tool using Tango’s browser extension so help is available at the moment of need.
Tango Pricing: What You Get on Each Plan
Tango offers a free tier that covers most individual use cases. Paid plans unlock features built for teams.
- Free Plan: Unlimited guide creation, shareable links, PDF export, basic editing tools. Good for freelancers, solo content creators, and educators.
- Pro Plan: Starts at $24 per month per user. Adds desktop app capture (for non-browser software), advanced screenshot editing, custom branding, and guide analytics.
- Business and Enterprise Plans: Unlimited workflows, team folders, SSO, advanced permissions, dedicated support, and SOC 2 compliance for security-sensitive environments. Pricing is available on request for Enterprise.
If you create more than a few guides per month, the Pro plan pays for itself quickly in time saved.
Tango Tips That Actually Make a Difference

Most guides stop at the basics. Here are the things that separate a good Tango workflow from a great one.
- Start from the right page. Before recording, navigate to the exact starting point of the process. This saves you from deleting several unnecessary steps at the beginning.
- Use the pause button freely. Any time you need to log in, enter sensitive credentials, or navigate somewhere unrelated, pause the recording. Resume when you are ready for the next relevant step.
- Write step titles in imperative form. Start each step with a verb: “Click,” “Type,” “Select,” “Navigate to.” This matches how people read instructions and makes the guide faster to scan.
- Zoom in on important UI elements. A full-page screenshot of a dashboard can make a small button impossible to spot. Use Tango’s crop and zoom tools to focus each screenshot on what matters in that step.
- Create one guide per task, not one guide per tool. A guide for “How to add a new user in Salesforce” is more useful than a guide for “How to use Salesforce.” Keep guides focused and specific.
- Update guides when the software changes. If the UI of a tool you have documented changes, Tango makes updating easy. Re-record just the affected steps and replace them individually without redoing the whole guide.
- Add a summary step at the end. Finish each guide with a brief “You’re done” step that confirms what the user has accomplished. This gives readers a sense of completion and confirms they followed the process correctly.
Tango vs. Writing Guides Manually
Here is the honest comparison most people need before they start:
| Manual Guide Creation | Tango | |
|---|---|---|
| Time per guide | 1 to 3 hours | 5 to 15 minutes |
| Screenshot quality | Depends on tools used | Auto-cropped and annotated |
| Consistency across guides | Variable | Consistent formatting |
| Update effort when UI changes | High (redo screenshots manually) | Low (re-capture affected steps) |
| Design skills required | Sometimes | None |
| Export options | Depends on tool | PDF, HTML, Markdown, link, embed |
Common Questions About Tango How-To Guides
Does Tango work on all websites?
Tango works on any website or web-based SaaS application using Chrome or Edge. For desktop software (applications installed on your computer), you need the Tango desktop app, which is available on the Pro and Enterprise plans.
Can viewers use Tango guides without an account?
Yes. Anyone with the link can view a guide without signing up. If you want to restrict access, paid plans offer password protection and team-only sharing settings.
Is Tango secure for sensitive workflows?
Tango is SOC 2 compliant, which is the standard for security and data protection in B2B software. The blur tool lets you redact sensitive data from screenshots before sharing. For highly regulated environments, Enterprise plans include additional controls.
Can I use Tango for non-web processes?
Tango is primarily web-based. For desktop applications, you need the Pro plan and desktop app. For completely offline processes (physical tasks, in-person training), Tango allows you to add “manual steps” by uploading your own screenshots and writing the descriptions yourself.
How long does it take to learn Tango?
Most people are creating their first guide within ten minutes of installing the extension. The learning curve is minimal compared to most documentation tools.
Final Thoughts
Tango solves a real problem: creating clear, visual how-to guides takes too long and updating them takes even longer. By automating the capture, cropping, and formatting of each step, Tango turns a two-hour task into a fifteen-minute one.
The features that set it apart from simply writing instructions or recording a video are Guidance Mode (which overlays instructions directly on the tool being used), built-in analytics (which shows you where guides break down), and the ability to update individual steps without redoing an entire guide.
If you document processes for a team, train new employees, support customers, or create tutorials for any audience, Tango is one of the most practical tools you can add to your workflow this year.
Start with the free plan. Create your first guide in under ten minutes. You will have a clear sense of whether it fits your workflow before you ever need to think about pricing.
You May Also Like It:
The Tech Yourself How to Guides Mist Gamer Purchase