

How to Remove Acrylic Nails Acrylic nails are popular because they look stylish last long, and instantly enhance the appearance of your hands However removing them incorrectly can seriously damage your natural nails If you want to learn how to remove acrylic nails safely at home this guide explains everything in a clear and practical way
This article also includes safety tips common mistakes proper aftercare and expert advice that many competitors do not fully explain
What Are Acrylic Nails
Acrylic nails are artificial nail extensions created using a mixture of liquid monomer and powder polymer. This mixture forms a hard layer that is placed over your natural nails to extend their length and improve their appearance.
They are widely used because:
- They provide instant length
- They support different nail designs
- They last for several weeks
However, improper removal can lead to:
- Weak natural nails
- Nail thinning
- Painful damage to nail beds
- Dry cuticles
That is why learning the correct method of how to remove acrylic nails is important.
Important Things to Know Before Removal
Before starting the removal process, keep these important points in mind:
Do Not Pull or Peel Acrylic Nails
Pulling acrylic nails can remove layers of your natural nails and cause long-term damage.
Nails Need Recovery Time
After removal, nails may feel soft or weak. This is normal and temporary.
Avoid Removal If Nails Are Infected
If you notice redness, swelling, or pain, avoid removing them at home and consult a professional.
Tools You Need
To safely remove acrylic nails at home, prepare the following tools:
- Nail clippers
- Nail file
- 100 percent pure acetone
- Cotton pads or cotton balls
- Aluminum foil
- Cuticle stick
- Petroleum jelly
- Nail buffer
- Hand cream or cuticle oil
Pro tip: Always work in a well ventilated area because acetone has a strong smell and can dry out the skin.
Method 1: How to Remove Acrylic Nails with Acetone
This is the most effective and commonly used method.
Step 1: Trim the Acrylic Nails
Use nail clippers to cut the acrylic nails as short as possible.
This step helps:
- Reduce soaking time
- Make removal easier
- Prevent unnecessary pressure on nails
Step 2: File the Top Layer
Gently file the shiny surface of the acrylic nails.
Important points:
- Do not file your natural nails
- Remove only the top shiny layer
- Use light pressure
This helps acetone work faster.
Step 3: Protect Your Skin
Apply petroleum jelly around your cuticles and surrounding skin.
This helps prevent:
- Dryness
- Irritation caused by acetone
Step 4: Soak Cotton in Acetone
Soak cotton balls in acetone and place them on each nail.
Then wrap each finger with aluminum foil to hold the cotton in place.
Step 5: Wait 20 to 40 Minutes
Allow the acetone to soften the acrylic nails.
During this time:
- Acrylic becomes soft
- It starts lifting from the nail
Do not rush this step, as it is very important for safe removal.
Step 6: Gently Remove Acrylic
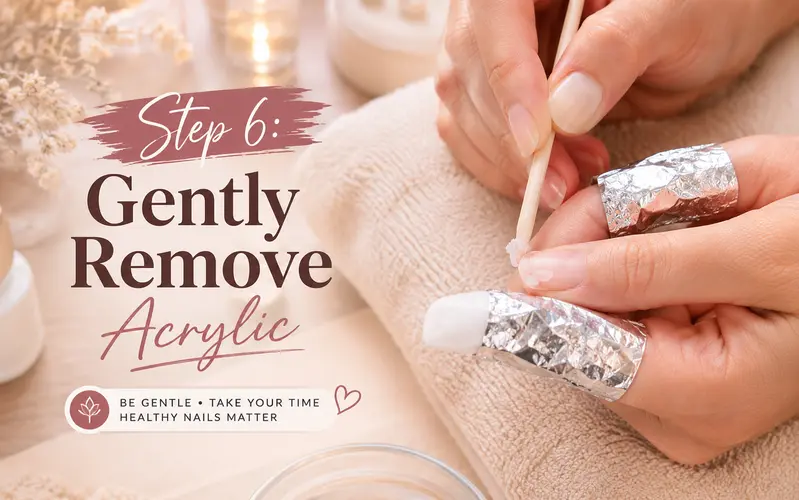
Remove the foil from one nail at a time and gently push off the acrylic using a cuticle stick.
If it does not come off easily:
- Soak for an additional 10 minutes
Never force or pull it.
Step 7: Clean and Buff Nails
After removal:
- Buff any remaining residue
- Wash hands with mild soap
- Dry thoroughly
Method 2: How to Remove Acrylic Nails Without Acetone
If you want a gentler method, you can try this option.
Warm Water and Oil Method
You need:
- Warm water
- Dish soap
- Olive oil
Steps:
- Mix warm water, soap, and oil
- Soak nails for 30 to 40 minutes
- Gently lift acrylic using a cuticle stick
This method is safer but takes more time compared to acetone.
Method 3: Dental Floss Method
This method is only suitable if the acrylic nails are already loose.
Steps:
- Lift the edge using a cuticle stick
- Insert dental floss under the acrylic
- Move it gently back and forth
Warning: This method can damage nails if done incorrectly or too early.
Common Mistakes to Avoid
Many people damage their nails due to these mistakes:
- Pulling acrylic nails forcefully
- Skipping the filing step
- Using low quality acetone
- Not soaking long enough
- Ignoring aftercare
Avoiding these mistakes will protect your natural nails.
Signs of Proper Removal
You are removing acrylic nails correctly if:
- The acrylic feels soft
- It lifts without force
- Your natural nails remain smooth
If you feel pain, stop immediately.
Aftercare for Healthy Nails

After removing acrylic nails, proper care is very important.
Moisturize Regularly
Use cuticle oil and hand cream multiple times a day to restore moisture.
Strengthen Your Nails
Use nail strengthening treatments to improve nail health.
Keep Nails Short
Short nails reduce breakage and help recovery.
Eat Healthy Foods
Include foods rich in protein, vitamins, and minerals to support nail growth.
Avoid Harsh Chemicals
Avoid strong cleaning chemicals for a few days or wear gloves.
How Long Does Nail Recovery Take
Recovery time depends on nail condition:
- Light damage: 1 to 2 weeks
- Moderate damage: 3 to 4 weeks
- Heavy use: up to 2 months
Expert Tips for Safe Removal
- Always use 100 percent acetone
- Never rush the soaking process
- Keep nails moisturized after removal
- Do not reuse foil wraps
- Work in a ventilated space
Frequently Asked Questions
How long does it take to remove acrylic nails at home?
It usually takes 30 to 60 minutes depending on nail thickness.
What is the fastest way to remove acrylic nails?
Soaking in acetone is the fastest and safest method.
Can I remove acrylic nails with hot water?
Yes, but it is slower and less effective than acetone.
Does acetone damage nails?
It can cause dryness if overused, but proper aftercare prevents damage.
Final Thoughts
Learning how to remove acrylic nails safely at home helps you protect your natural nails while saving time and money. The key is patience, proper tools, and correct aftercare. If you follow the steps carefully, you can remove acrylic nails safely without damage and keep your nails healthy for future use.