
How to write effective mini guides most guides fail before the reader even reaches step two they are too long. Too vague too focused on impressing the writer rather than helping the reader. A mini guide fixes all of that. It is focused, fast, and built around one specific outcome.
This article shows you exactly how to write effective mini guides from scratch. You will learn what makes them work, how to structure them, and what most writers get wrong.
What Is a Mini Guide and Why Does It Matter
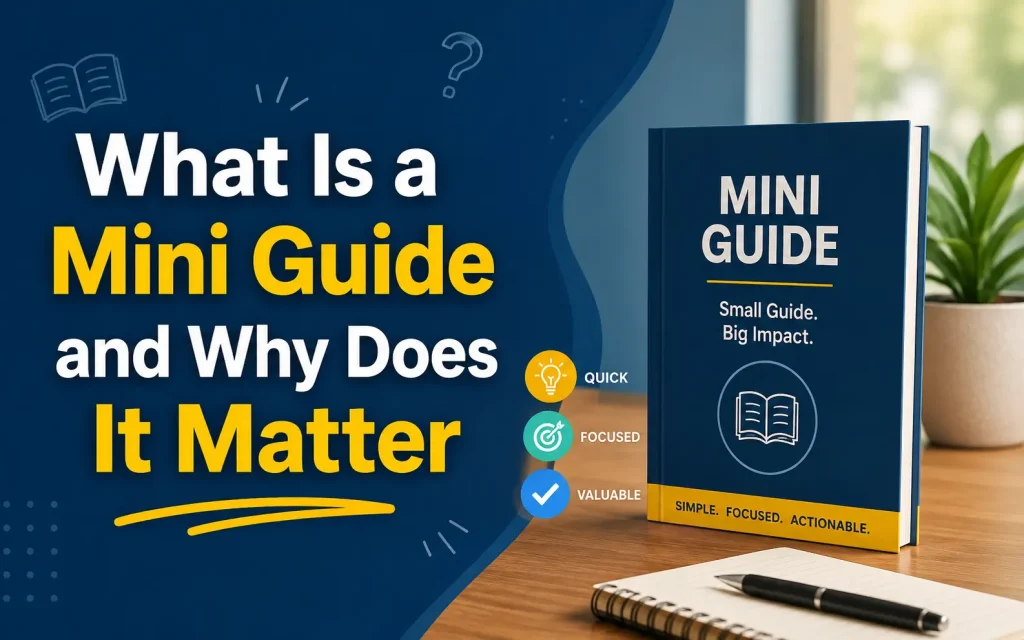
A mini guide is a short, focused instructional document that helps a reader complete one specific task or understand one specific idea. It is not a textbook. It is not a blog post padded with filler. It is a tight set of instructions that gets someone from point A to point B with as little friction as possible.
Mini guides matter because attention is short. Readers do not want to scroll through 5000 words to find the three steps they actually need. A well-written mini guide respects the reader’s time and delivers value fast.
They are also powerful for businesses. A good mini guide builds trust, reduces support requests, and positions you as an expert in your field.
The One Mistake Most Writers Make Before They Even Start
Most writers open a blank document and start typing. That is the wrong move.
Before you write a single word, you need to answer one question: what does my reader need to be able to do after reading this.
If you cannot answer that in one sentence, your mini guide does not have a clear purpose yet. Stop. Think. Then start.
This single-outcome focus is what separates mini guides from general articles. Every section, every step, every sentence should serve that one outcome.
Step 1: Know Exactly Who You Are Writing For
Your mini guide is not for everyone. The more specific your audience, the more useful your guide becomes.
Ask yourself:
- Are they beginners or do they have some background knowledge
- What problem are they trying to solve right now
- What words do they use when they search for help online
- What mistakes do they commonly make
Write down your answers before you begin. This exercise shapes everything: your vocabulary, your tone, the examples you choose, and how much you explain.
A guide written for a 50-year-old business owner who has never used email marketing will look completely different from a guide written for a junior marketer at a startup. Same topic, very different guides.
Step 2: Pick a Topic That Is Narrow Enough to Cover Well
One of the biggest problems with how-to content is that it tries to cover too much. A mini guide about social media marketing is not a mini guide. It is a textbook waiting to happen.
A mini guide about how to write your first Instagram bio in 20 minutes is actually achievable.
To narrow your topic, ask: can I walk someone through this in under 1500 words and have them succeed? If the answer is no, cut it down further.
A good test is the grocery list rule. If your topic could fill an entire aisle of a grocery store, it is too broad. Pick one product off that shelf.
Step 3: Research Before You Write
Even if you know your subject well, research before you write. This is not about doubting yourself. It is about finding the gaps your competitors have missed and the questions your readers are already asking.
Here is how to research effectively for a mini guide:
- Search your topic on Google and read the top results. Note what they cover and what they skip.
- Check forums like Reddit or Quora for the questions real people ask about this topic.
- Read the comments on YouTube videos related to your topic. Comments are full of confusion, gaps, and follow-up questions.
- If you are writing about a process you do yourself, walk through it step by step and take notes as you go. You will catch steps you have been doing automatically without thinking.
The goal of research is not to copy others. It is to find what is missing and fill that gap.
Step 4: Build a Tight Outline Before You Write
A mini guide without an outline becomes a mini guide that meanders.
Your outline does not need to be complicated. It needs to answer: what comes first, what comes next, and what does the reader walk away with.
A simple outline structure that works:
- Hook: why this matters to the reader right now
- What the reader will be able to do after reading
- Any tools or materials they need before starting
- The steps, in order
- Common mistakes to avoid
- A quick summary or checklist
- What to do next
Not every mini guide needs all seven sections. But having this structure in front of you before you write keeps you on track.
Step 5: Write the Steps in the Right Order
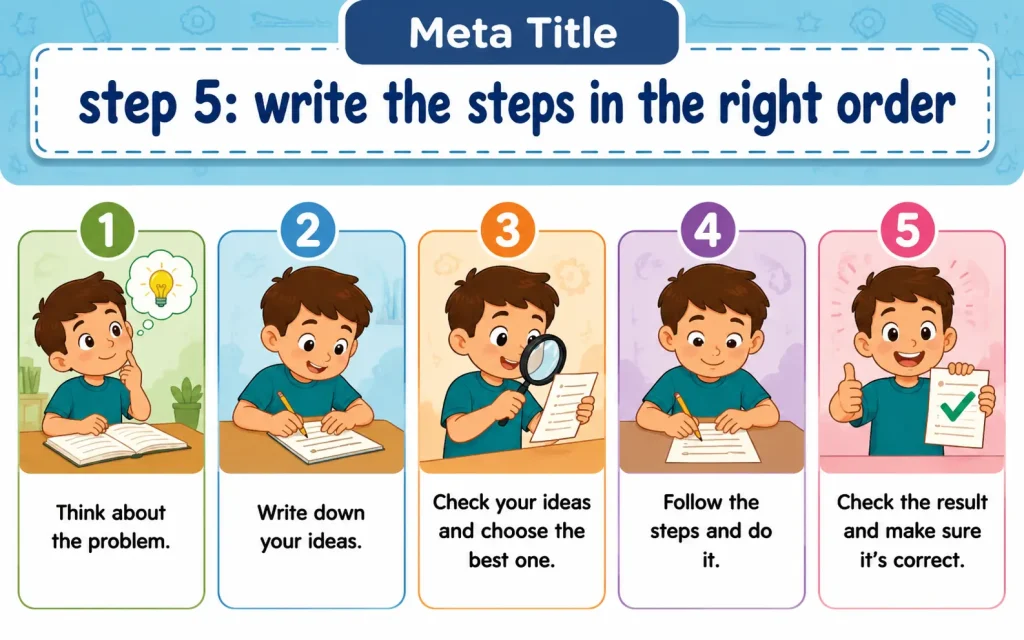
This sounds obvious. It is not.
Writers often write steps in the order they know the material, not in the order the reader needs to learn it. Those two orders are often different.
Here is how to get the order right:
Start from zero. Pretend you have never done this task before. Walk through it from the very beginning. What is the first thing you physically or mentally do? That is step one.
Each step should have one action. Not two, not three. One. If you write “research your topic and build your outline,” that is two steps. Split them.
Each step should also include a brief explanation of why it matters. Readers follow instructions more carefully when they understand the reason behind them.
Step 6: Write in Plain Language
Plain language is not dumbing things down. It is communicating efficiently.
Rules that always work:
- Use short sentences. Aim for an average of 15 to 20 words per sentence.
- Use active voice. Write “click the button” not “the button should be clicked.”
- Avoid jargon unless your audience uses it daily. If you must use a technical term, define it on first use.
- Use the word “you” to speak directly to your reader.
- Cut any sentence that does not add new information.
Read your draft out loud after you finish. If you stumble on a sentence, rewrite it. Your reader will stumble on it too.
Step 7: Format for Skimmability
Most readers scan before they read. If your mini guide does not make sense on a quick scroll, many readers will leave before they start.
Format every mini guide with these elements:
- A clear headline that states exactly what the reader will learn or achieve
- Subheadings for each major section or step
- Numbered lists for sequential steps
- Bullet points for non-sequential items or tips
- Short paragraphs of two to four sentences
- Bold text for key terms or critical warnings
- White space between sections so the page does not feel like a wall of text
One formatting rule that most guides miss: write your subheadings as if they are the only thing a reader will read. If someone skims only the headings, they should still understand the shape of the guide and what it covers.
Step 8: Add Visuals Where They Replace Words
A screenshot or diagram can replace two paragraphs of explanation Use visuals when:
- You are describing something that happens on a screen
- The spatial relationship between elements matters
- A process has multiple paths or decision points
- A comparison between two options is clearer in a table
Do not add visuals just to break up text. Every image should earn its place by making the instructions clearer.
Caption every image. A caption tells the reader exactly what they are looking at and why it matters.
Step 9: Anticipate the Moments Where Readers Get Stuck
This is the section most competitors skip entirely, and it is one of the most valuable things you can add to any mini guide.
Think about every step in your guide. At which point do readers most commonly make a mistake. At which point do they get confused and give up.
Write a short note at those moments. Frame it as a warning, a tip, or a common question. For example:
“Note: If you do not see the Save button, your screen may be in mobile view. Switch to desktop view and the button will appear in the top right corner.”
This kind of anticipatory writing turns a basic guide into a guide that actually solves problems instead of creating new ones.
Step 10: End With a Clear Next Step
Do not let your mini guide end with a summary and nothing else. Every reader who finishes your guide is in a specific state: they have just learned something. Give them somewhere to go with it.
Your closing next step could be:
- A related mini guide that builds on this one
- A checklist they can download or save
- An action they should take within the next 10 minutes while the information is fresh
- A resource that goes deeper on one part of the topic
The next step transforms your guide from a passive read into an active experience.
Common Mistakes to Avoid When Writing Mini Guides
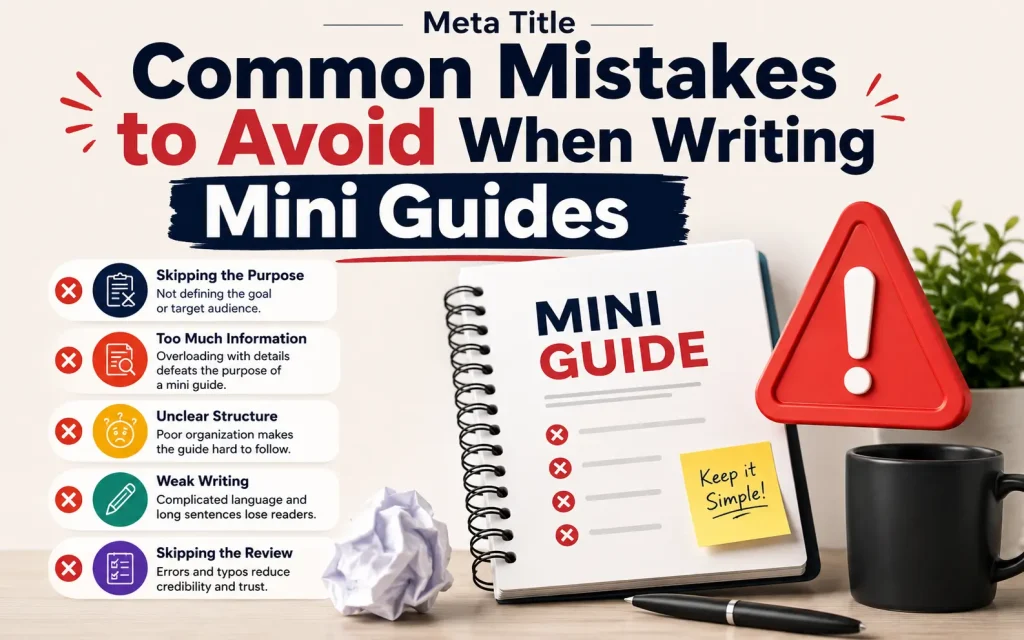
These are the mistakes that appear most often in guides that do not perform well:
Writing for yourself instead of your reader: If your guide is full of your opinions and your story, you have lost the plot. The reader came for help, not a memoir.
Skipping the prerequisites section: If a reader needs a specific tool, account, or piece of information before they can start, tell them at the beginning: Nothing frustrates a reader more than reaching step four and discovering they needed to do something at step zero.
Using passive voice throughout: “The file should be saved” is weaker and harder to follow than “Save the file.”
Making steps too long : If a step takes more than five sentences to explain, it probably contains two or more steps. Break it down.
Never updating the guide: Tools change. Interfaces change. Processes change. A guide written two years ago that no longer matches reality is worse than no guide at all : Build a habit of reviewing your mini guides every six to twelve months.
A Quick Checklist Before You Publish
Use this list every time before you publish a mini guide:
- Does the title clearly state what the reader will achieve
- Is the target audience obvious from the first paragraph
- Are the steps in the correct order for a first-time reader
- Does each step contain exactly one action
- Is every sentence in active voice
- Have you removed all jargon your audience would not know
- Are visuals captioned and directly relevant to the instructions
- Have you noted the common sticking points and how to get past them
- Does the guide end with a clear next step?
- Have you read the entire guide out loud at least once
If you can check every item on this list, your mini guide is ready to publish.
FAQs
What is a mini guide?
A mini guide is a short, focused piece of content that explains a specific topic, process, or solution in a clear and easy-to-follow format.
How do you write an effective mini guide?
Start with a clear objective, organize information logically, use simple language, and provide actionable steps that help readers achieve a specific goal.
How long should a mini guide be?
Most mini guides range from 300 to 1,000 words, depending on the complexity of the topic and the audience’s needs.
What should be included in a mini guide?
A mini guide should include an introduction, key steps or tips, practical examples, and a concise conclusion or takeaway.
Why are mini guides effective?
Mini guides are effective because they deliver useful information quickly, making them easier to read and understand than lengthy articles.
How can I make my mini guide more engaging?
Use headings, bullet points, examples, visuals, and concise paragraphs to improve readability and keep readers interested.
Who can benefit from mini guides?
Businesses, bloggers, marketers, educators, and content creators can all use mini guides to share knowledge and educate their audiences.hna
Final Thought
Writing effective mini guides is a skill that improves with practice. The first one will take you longer than you expect. The tenth one will feel almost effortless.
The underlying principle never changes: know exactly who you are writing for, pick one clear outcome, and remove everything that does not serve that outcome.
That discipline is what separates a mini guide that sits unread on a website from one that people save, share, and return to.
Start with one. Keep it tight. Make it useful.
You May Also Like It:
How Is It Possible for Ski Jumpers to Stay in the Air So Long and How Do They Train for That